In this, the second part of our article on transformations I will introduce SRT (Scaling, Rotation, Translation) transformations. Unlike the previous article, this one will have a lot less maths and shows you a simpler way to work with transformations in RealityServer. Additionally the method allows for automatic interpolation of transformations over time in a smooth way which is great for creating animations. Once things are moving you can also introduce motion blur for more realistic results. Read on to discover the ease of SRT transformations.
This article assumes you have at least skimmed the previous part of this article, 3D Transformations – Part 1 Matrices. While you don’t need to fully understand the matrix transformations, we will be using the same example scene code for this article. So, it is not repeated here, please review the previous article for the commands needed to create the base scene.
As with the previous part of this article, all angles are expressed in radians rather than degrees. You might remember the simple formula for converting degrees to radians.
The examples in this article are the raw JSON-RPC command sequences that get sent to RealityServer. If you have not done so already please read the article on Exploring the RealityServer JSON-RPC API.
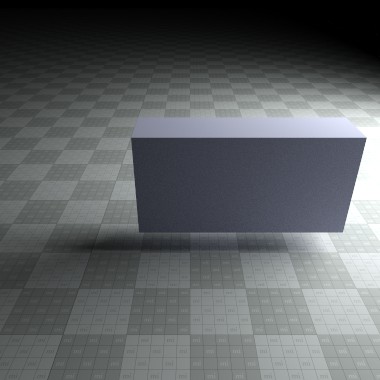
Like last time, let’s start with the simplest type of transformation first, translations. With SRT based transformations there is no need to specify an entire matrix, we instead specify the actual type of transformation we are doing and the values that drive it.
So for example, if you want to move your object 1 unit in the x direction, -2 units in the y direction and 0.5 units in the z direction we would use the command shown below. Note that like matrix transformations we still must past the values negated.
You can omit the resize parameter of the command as it defaults to true. Leave it on as it will automatically handle various things for you (more on that when we get to animations). For now just leave time_index and transform_index at 0 since we are not using time and only have a single transformation element. Later we will see how to use multiple elements. For now, here is how to do the translation.
{
  "jsonrpc": "2.0",
  "method": "instance_set_transformation",
  "params": {
    "instance_name" : "exBoxInstance",
    "resize" : true,
    "time_index" : 0,
    "transform_index" : 0,
    "transformation" : {
      "type" : "translation",
      "element" : [-1,2,-0.5]
    }
  },
  "id": 1000
}
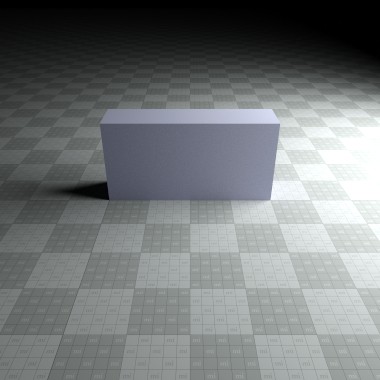
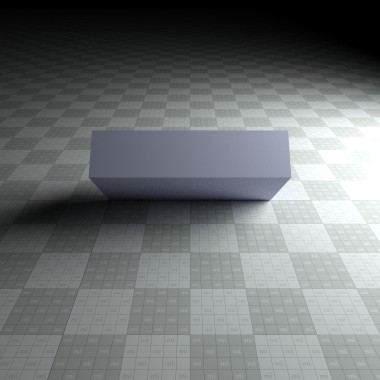
Rotations are where the the ease of SRT transformations really start to show. You specify them as four floating point numbers, the first three specify the axis for rotation and the forth the rotation angle (in radians). So, the one method can be used for both orthogonal axis rotations as well as arbitrary ones.
Let’s do a quick example. We’ll rotate 45° in the x axis (1,0,0). So that will be 0.7853981634 radians. Again, we must negate our angles before passing them to our transformation. The command for applying this is below. Rotating around other axis are equally easy.
{
  "jsonrpc": "2.0",
  "method": "instance_set_transformation",
  "params": {
    "instance_name" : "exBoxInstance",
    "resize" : true,
    "time_index" : 0,
    "transform_index" : 0,
    "transformation" : {
      "type" : "rotation",
      "element" : [1,0,0,-0.7853981634]
    }
  },
  "id": 1000
}

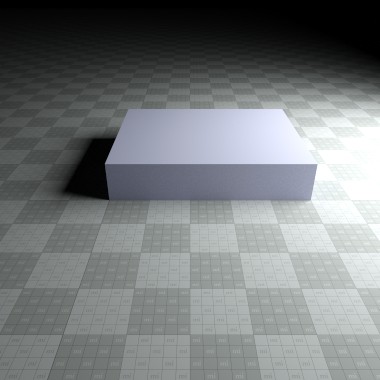
Scaling like before is very simple, even more so with SRT. You will need to invert your scale factors just as we do with matrix based scaling. For a quick example let’s scale by 1.25 in the x axis, 4 in the y axis and 0.5 in the z axis. This is obviously a non-uniform scaling. Note that negative scales will mirror your object. Below is the command needed for scaling.
{
  "jsonrpc": "2.0",
  "method": "instance_set_transformation",
  "params": {
    "instance_name" : "exBoxInstance",
    "resize" : true,
    "time_index" : 0,
    "transform_index" : 0,
    "transformation" : {
      "type" : "scaling",
      "element" : [0.8,0.25,2]
    }
  },
  "id": 1000
}

This is where SRT really does some magic. It becomes much simpler to combine sequences of transformation types together in any way you like to, without having to deal with matrix multiplication or other issues. You simply list them all and combining them will be taken care of for you. Note that like working with matrix transformations though, order is important. Let’s take our translation example and just for the same of it break it up into a series of three translations. It would look like this.
{
  "jsonrpc": "2.0",
  "method": "instance_set_transformations",
  "params": {
    "instance_name" : "exBoxInstance",
    "change_types" : true,
    "resize" : true,
    "time_index" : 0,
    "transformations" : [
      {
        "type" : "translation",
        "element" : [-1,0,0]
      },
      {
        "type" : "translation",
        "element" : [0,2,0]
      },
      {
        "type" : "translation",
        "element" : [0,0,-0.5]
      }
    ]
  },
  "id": 1000
}


So we first translate by 1 unit in the x direction, then -2 units in the y direction followed by 0.5 units in the z direction. Combining all of these is done for us. We can mix and match any number of transformations of different types together in a single sequence of transformations. Let’s put together the three we made earlier to do a translation followed by a rotation followed by a scaling operation.
{
  "jsonrpc": "2.0",
  "method": "instance_set_transformations",
  "params": {
    "instance_name" : "exBoxInstance",
    "change_types" : true,
    "resize" : true,
    "time_index" : 0,
    "transformations" : [
      {
        "type" : "translation",
        "element" : [-1,2,-0.5]
      },
      {
        "type" : "rotation",
        "element" : [1,0,0,-0.7853981634]
      },
      {
        "type" : "scaling",
        "element" : [0.8,0.25,2]
      }
    ]
  },
  "id": 1000
}
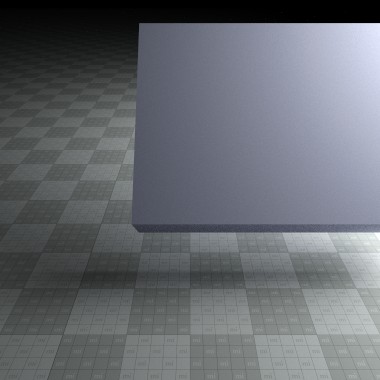

Using this approach makes working with transformations very intuitive. If you will be editing existing transformations then you might want to review the documentation for the change_types and resize parameters in more detail since they will affect how existing transformations are edited.
Everything we have done above has just left the time_index parameter at 0. This effectively means we are only specifying our transformations for one point in time. To create animations, we need to add transformation information at additional points in time. We can do this by creating enough time slots to hold the transformations at the times we want. Let’s add 3 time slots so we can specify the translations at 3 points in time.
{
  "jsonrpc": "2.0",
  "method": "instance_set_time_slot_size",
  "params": {
    "instance_name" : "exBoxInstance",
    "count" : 3
  },
  "id": 1000
}
Next we assign time values to each slot. These values are not in any particular unit, so it is up to you to determine how you want to make these values to shutter times used later. I tend to use seconds just because it is easy to keep track of. So I’ll put three time points in at 0.0, 0.25 and 3.0 seconds using the following command.
{
  "jsonrpc": "2.0",
  "method": "instance_set_index_times",
  "params": {
    "instance_name" : "exBoxInstance",
    "times" : [0.0, 0.25, 3.0]
  },
  "id": 1000
}
We can then start using these time slots when we set our transformations by setting the time_index parameter to point to the time we want to set the transformation to. We can then just call instance_set_transformation and we will have nice motion transforms.
{
  "jsonrpc": "2.0",
  "method": "instance_set_transformation",
  "params": {
    "instance_name" : "exBoxInstance",
    "resize" : true,
    "time_index" : 0,
    "transform_index" : 0,
    "transformation" : {
      "type" : "translation",
      "element" : [-1,2,-0.5]
    }
  },
  "id": 1000
},
{
  "jsonrpc": "2.0",
  "method": "instance_set_transformation",
  "params": {
    "instance_name" : "exBoxInstance",
    "resize" : true,
    "time_index" : 1,
    "transform_index" : 0,
    "transformation" : {
      "type" : "rotation",
      "element" : [1,0,0,-0.7853981634]
    }
  },
  "id": 1001
},
{
  "jsonrpc": "2.0",
  "method": "instance_set_transformation",
  "params": {
    "instance_name" : "exBoxInstance",
    "resize" : true,
    "time_index" : 2,
    "transform_index" : 0,
    "transformation" : {
      "type" : "scaling",
      "element" : [0.8,0.25,2]
    }
  },
  "id": 1002
}
This is pretty tedious though and could get pretty messy when there is a lot of animation going on. In this case the movement from the initial transform to the second will proceed much faster than the movement from the second to the third (you’ll see why I did that a little later). While simple, its already enough to look a bit complex using the single transformation command. We have a better way to handle this using a new command. Here is how it looks.
{
  "jsonrpc": "2.0",
  "method": "instance_set_transforms",
  "params": {
    "instance_name" : "exBoxInstance",
    "change_types" : true,
    "resize" : true,
    "transforms" : [
      {
        "time" : 0.0,
        "transforms" : [
          {
            "type" : "translation",
            "element" : [0,0,0]
          },
          {
            "type" : "rotation",
            "element" : [0,0,0,0]
          }
        ]
      },
      {
        "time" : 1.1,
        "transforms" : [
          {
            "type" : "translation",
            "element" : [-1,2,-0.5]
          },
          {
            "type" : "rotation",
            "element" : [1,0,0,-0.7853981634]
          }
        ]
      },
      {
        "time" : 3.0,
        "transforms" : [
          {
            "type" : "translation",
            "element" : [-1.25,2,0]
          },
          {
            "type" : "rotation",
            "element" : [0,0,0,0]
          }
        ]
      }
    ]
  },
  "id": 1000
}
So, instead of calling instance_set_transformation repeatedly with different transform_index and time_index values we can just call instance_set_transforms and set everything at once. This handles all of the time slot creation for us and automatically puts in enough slots to hold the transforms.You might notice I had to insert rotation transforms that don’t do anything to get all of the time slots to have the same number of transforms (this is required). You might also notice that this command uses float time values rather than time indices, this is possible since it is automatically making the slots behind the scenes.
Unlike matrix transforms, the above is quite readable. So we start at time 0.0 with everything at the origin with no rotation. By the time 0.5 seconds we have translated to (1,-2,0.5) and then rotated by 45° in the x axis (a combined transformation). Finally at time 3.0 seconds we are translated to (1.25,-2,0) and reset our rotation so the object is unrotated again. Note that all of the transformations are absolute, not relative.
If we render the scene now, we will see the object at time 0.0 since we haven’t told the renderer what point in time to render yet. For that purpose we have some more special commands. Once we specify a given time to render, the transformations will be interpolated for the point in time we selected from the data that is available. So if we want to render at time 0.12 seconds for example we need to use this command first.
{
  "jsonrpc": "2.0",
  "method": "options_set_shutter_open_close",
  "params": {
    "options_name" : "exOptions",
    "shutter_open" : 0.12,
    "shutter_close" : 0.12
  },
  "id": 1000
}


There are also individual commands for just setting the shutter open and close alone if you wish, however the vast majority of the time you will want to set both at once. You’ll notice we are setting them both to the same value for now. Now if we render repeatedly, setting a different shutter open and close time for each frame we can effectively render an animation, without having to explicitly change transformations at all.
You can do this any number of ways, I just did a little shell script for that purpose, advancing the shutter open and close time by 0.04 seconds per frame to give me 25 fps. Rendering those frames give me the short animation on the right. The short burst of movement at the start looks a bit unnatural for some reason though. I wonder what would happen if we set the shutter open and close times further apart…
Now that we have moving objects, to make them more realistic we need to account for motion blur. The great thing about SRT transformations is that it makes it very easy for the rendering engine to work out where an object was and where it will be. With this information the renderer can sample the object at more than one point in time to generate motion blur.
Remember when exploring animations previously, we just set the open and close shutter time to the same value. This in effect means we are capturing only an instant in time. In reality, when you take a picture with a camera, the camera shutter is open for a longer period of time, during this time objects may move, creating blur. So all we need to do i order to reproduce this is set our shutter open and close times to have some time between them. We use the same command as before but introduce some time between the open and close. Let’s add 0.04 seconds of time to correspond to the shutter speed at 25 fps.
{
  "jsonrpc": "2.0",
  "method": "element_set_attribute",
  "params": {
    "element_name": "exOptions",
    "attribute_name": "progressive_samples_per_motion_sample",
    "attribute_type": "Sint32",
    "attribute_value": 8,
    "create": true
  },
  "id": 999
},
{
  "jsonrpc": "2.0",
  "method": "options_set_shutter_open_close",
  "params": {
    "options_name" : "exOptions",
    "shutter_open" : 0.12,
    "shutter_close" : 0.16
  },
  "id": 1000
}
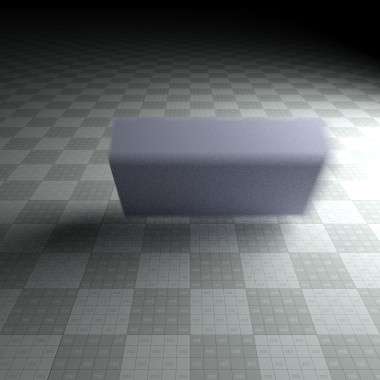

In the commands above you can also set we are setting the progressive_samples_per_motion_sample option. This controls the number of sub-frames rendered before the scene is updated to a different time value. A higher value optimizes render performance at the cost of a higher number of total frames required before the separate motion step samples become invisible in the image. A lower value increases interactivity, but reduces total render performance (i.e. rendering x frames will take longer). A high value makes noise vanish faster, but motion converge slower – and vice versa, so this can be tweaked in one or the other direction, depending on the lighting complexity and the amount of motion specified for a scene. Only powers of 2 are valid. A value of 0 switches off motion blur (setting the shutter open and close to the same value also does this).
With SRT or matrix based transformation you should be able to express any type of object movement you need for your application. This article has shown some of the great functionality SRT based transformation adds in addition to great ease of use. Be sure to explore the complete set of instance released commands in your RealityServer command documentation for more details as we obviously couldn’t cover everything in this brief series of articles. If you have any questions or feedback don’t hesitate to contact us for more information.
Paul Arden has worked in the Computer Graphics industry for over 20 years, co-founding the architectural visualisation practice Luminova out of university before moving to mental images and NVIDIA to manage the Cloud-based rendering solution, RealityServer, now managed by migenius where Paul serves as CEO.